Showing posts with label Bread- yeast. Show all posts

Wednesday, February 2, 2011

Pizza Pizza!

Another pizza recipe??? What can I say, my family loves pizza! My husband really likes pizza and the kids are coming around to liking it. Since we were "home bound" for the ice day, we decided to make homemade pizza for lunch. We used the bread machine to mix and rise the dough- can't get much easier than that! This dough was really easy to work with and made a very good pizza! We made one pizza for the kids and one for us (spicy sauce). I baked theirs on a greased baking sheet and baked ours on a pizza stone. Both came out very good ! The one for the kids came out with a soft crust that they both loved. And ours came out with a crust that was crispy on the outside and soft and chewy on the inside- perfect! I would say that this recipe was definitely a success since Daniel had 6 pieces!! (That is saying A LOT for my picky eater!) We will definitely be making this one again!

This recipe is a compilation of many recipes that we have tried. The fun thing about making pizza is that you can add whatever toppings you like and everyone can help! We went simple and opted for cheese pizzas this time, but there are so many options!

**This pizza has quickly become a very requested thing in our house which still amazes me- my kids LOVE it! I wanted to add a few tips from the various times I have made it so far. First, the recipe says to divide the dough into 2 and work with your hands to spread it out to desired shape. The first time I made this, I was quite sure one half was not going to spread out to a good size. So, I decided to leave it as one piece and spread it out. MISTAKE! The pizza puffed up about 2 inches high in the oven and it was a crazy mess. Initially, it will seem impossible to spread it out with your hands. But trust me- it is very easy to work with on a greased pan. I can easily get one half of the dough to a 12" pizza size or even a little larger. If it seems hard to work with, let it rest a few minutes and try again. Second: There are times that the kids want pizza and we don't so 2 pizzas is too much. While my son loves the pizza, he isn't too fond of "reheated pizza". So, the last time I tried to refrigerate half of the recipe to use another day, but it just didn't work out :-( But on another occasion, I was able to halve all of the ingredients and make just one pizza.

**If you do not have a bread machine, you can still make this! If you have a stand mixer, combine the ingredients and use the dough hook attachment to knead the dough. (If you don't have a stand mixer, you can mix the ingredients by hand and knead until smooth) Turn the dough onto a lightly floured surface and knead until smooth. Spray an oven safe bowl with cooking spray. Put the dough in the bowl and turn it around to get the cooking spray on all sides. Cover the bowl with a towel and place in a warm area until the dough doubles. My trick for letting the dough rise is to turn your oven on to 170 degrees- once it gets to 170, turn the oven off and put the covered bowl in the oven until doubled- usually about 30-40 minutes.


Ingredients

1 cup warm water (110 degrees)
1 tsp sugar
2 tbsp olive oil
1 tbsp honey
1 tsp salt
3 cups bread flour
2 1/4 tsp yeast (I use bread machine yeast)
pizza sauce (canned or homemade)
shredded cheese
toppings of choice


Directions
Put ingredients in bread machine pan in order given above. Turn on dough cycle.

When dough is complete, remove from pan and put on a floured surface. Divide the dough into 2 pieces. Spray a heavy pizza pan with olive oil or cooking spray. Use your hands to flatten and stretch the dough to fit the pan. If you have trouble stretching the dough, let it rest a few minutes before continuing.

Layer sauce then cheese and other toppings. You want to keep the ingredient load in check- if you put too much, it will cause the crust to be too soggy and take too long to bake. Bake in oven preheated to 450 degrees. Let cool 2-3 minutes before slicing. As much as you will want to cut right into the pizza, allowing it to rest a few minutes will keep the cheese from sliding off!


ENJOY!!

Thursday, January 27, 2011

Parker House Rolls

I definitely have a "love-love" relationship with bread...I love to bake it and I love to eat it!! I guess it's a good thing I'm training for a half marathon! For years, I was intimidated by making homemade yeast breads, but now that I have mastered it, there's no stopping me! I sometimes drool over bread recipes. But since we can only eat so much ourselves (because after all fresh is best), I send a lot to work with my husband. His co-workers seem to enjoy the bread almost as much as my famous cake bites! Although I have great success with bread, I do have failures from time to time. I have not mastered the "rapid rise" breads yet, but hope to soon. When I have a failure, it just makes me more determined than ever to get it right!

I found this recipe in the November 2010 Food Network Magazine and had to add it to our Thanksgiving menu. The recipe looked involved, but I was not intimidated in the least. This made a very light, airy and oh-so-tasty roll to accompany any meal. The rolls didn't last long at all which is good since bread is best right after being made.


Ingredients
1 package active dry yeast (I used 2 1/4 tsp bread machine yeast)
1/2 cup sugar
7 1/2 to 8 cups all purpose flour, plus more for dusting
12 tbsp (1 1/2 sticks) unsalted butter, melted and cooled
3 tbsp softened butter for brushing hot rolls
2 cups whole milk, at room temperature
2 large eggs, at room temperature
1 tbsp kosher salt, plus more for sprinkling

Directions

Sprinkle the yeast into a bowl. Add 1/2 cup warm water (110-120 degrees). Whisk in the sugar. Let sit 1 minute (it should bubble and froth at this time).

Gently stir in 1 cup flour. Set aside near stove while you prepare the dough.

Mix the melted butter and milk in a mixer with the dough hook on low speed. Add the eggs and mix until blended. Add the yeast mixture and mix until incorporated.

Add 6 1/2 cups flour and 1 tbsp salt. Mix until the dough forms a ball (about 2-3 minutes), adding up to 1/2 cup more flour if the dough is too wet and sticky. Brush a large bowl with softened butter (or spray with cooking spray). Transfer the dough to the bowl, cover with a towel and let rise in a warm place 2 hours to 2 1/2 hours.

The dough should double in volume. This sight always make my heart sing!!

Preheat the oven to 375 degrees and line a baking sheet with parchment paper. Dust a clean surface with flour and turn the dough onto it. Flour your hands and gently press the dough into a 16x8 inch rectangle that is about 1/2 to 3/4 inch thick. It's important to NOT use a rolling pin here.

With the short side in front of you, cut the dough in half lengthwise with a floured knife. Then slice crosswise into 12 strips.

One at a time, fold each strip of dough unevenly in half so the top part slightly overlaps the bottom half, then tuck the overhang underneath.


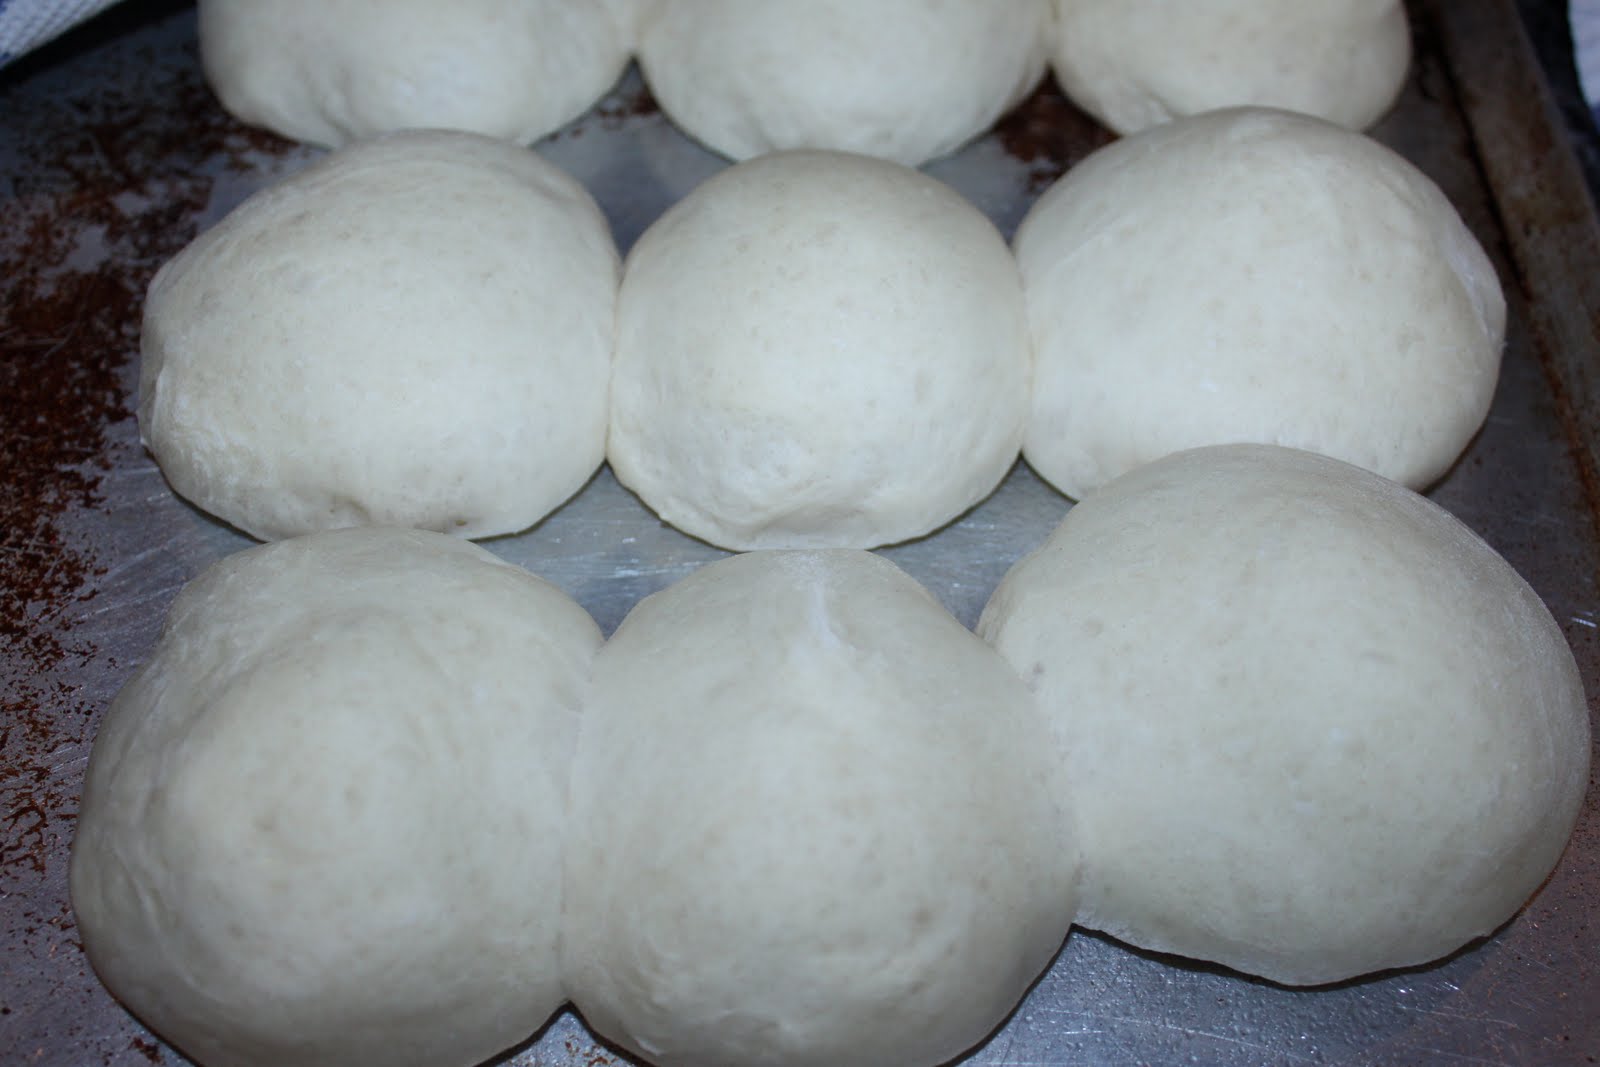
Place the rolls seam side down on the prepared baking sheet in 3 tightly packed rows. If you are making these in advance, you can tightly cover the baking sheet in plastic wrap and freeze up to 3 weeks.


Bake until the rolls are bursting at the seams and golden brown, 18-20 minutes. If frozen, bake 25 minutes at 325 and then 10 minutes at 375. Remove from oven and brush with softened butter. Sprinkle with salt and serve immediately.

ENJOY!!

Monday, January 17, 2011

Parmesan Garlic Breadsticks

I seem to have a thing for homemade bread- both making it and eating it!! I have found bread to be so easy and satisfying to make that we rarely buy anything other than sandwich bread. I found this recipe for breadsticks and knew I had to make them- and boy am I glad that I did!

My advice for successful bread baking is to first read through the entire recipe at least once to make sure you understand the techniques and process involved. Make sure to take note of rising times and allow enough time to make the bread. It is very disappointing to have dinner ready but the bread is still rising! With baking, you also want to use the ingredients called for and make sure you measure. Baking it a science and things need to be pretty close to exact for the best results. You also want to make sure your ingredients are fresh (or at least not outdated). And lastly, I would say that if you are on a diet, don't make homemade bread!! Homemade bread can ruin a diet in an instant- it's so hard to resist!! :-) Just look at this light, airy, buttery breadstick....yum!


Ingredients

2 packages active dry yeast (I used 4 1/2 tsp bread machine yeast)

1/2 cup sugar, divided

2 cups warm water (110 degrees), divided

3 tbsp vegetable oil

1 egg

1 tsp salt

5 1/2 cups all purpose flour

1/2 cup butter, softened

2 tbsp grated Parmesan cheese

1/4 tsp garlic powder


Directions

1. In a large mixing bowl, dissolve yeast and 1 tbsp sugar in 1 cup warm water. Let this sit for about 10 minutes until frothy.


2. Add the oil, egg, salt , 2 cups flour, remaining sugar and remaining water. Beat until smooth. Stir in enough remaining flour to make a soft dough. Turn onto a floured surface and knead until smooth and elastic (about 6-8 minutes). Place in a greased bowl, turning once to grease dough. Cover with towel and let rise in a warm place until doubled, about 40 minutes.

**When I am making the dough, I turn heat the oven to 170. When the dough is ready for the rise, I turn the oven off and put the covered dough in the oven. It usually takes roughly 20 minutes for the dough to double**


3. Punch the dough down (the kids like doing this part). Turn onto a floured surface and divide into 36 pieces. Shape each piece into a 6 inch rope. Place 2 inches apart on greased baking sheets. Cover and let rise until doubled, about 25 minutes.


4. Bake at 400 degrees for 10-12 minutes or until golden brown (I use a convection oven and it was closer to 9-10 minutes). While they are baking, mix the butter, Parmesan cheese and garlic powder. When you remove the breadsticks from the oven, brush them with the butter mixture.

** You can of course use butter alone, butter and salt or whatever suits your tastebuds**


ENJOY!!

Saturday, January 8, 2011

French Bread Rolls

I was looking for a bread to go with our cheese soup and found these French Bread Rolls. They were awesome and went great with the soup. The outside had a wonderfully crunchy texture while the inside had a melt in your mouth soft texture! These were perfect! I may or may not have eaten a few before dinner (no wonder I wasn't too hungry at dinner time- oops!). I modified the recipe to let my bread machine do most of the work. If you don't have a bread machine, refer to the original link for directions.


Ingredients

1 1/2 cups warm water (110 degrees)

1 tbsp bread machine yeast

2 tbsp sugar

2 tbsp vegetable oil

1 tsp salt

4 cups bread flour

Directions

1. Pour the warm water into the bread machine pan. Add the yeast and sugar and allow to sit for about 10 minutes. It should turn a little creamy.

2. Add the oil, salt and flour and turn the bread machine on the dough cycle.

(I was a little surprised at how much the dough rose in the machine- it actually pushed open the lid!) 3. Punch down the dough and turn onto a lightly floured surface. Divide the dough into 16 pieces and roll into balls. Place dough balls on an oiled baking sheet. Cover with a damp towel and let rise. Since it wasn't too warm in the house, I heated the oven to 170 degrees (then turned it off) and put the covered dough in the oven for about 30 minutes. They REALLY rose too!

4. Bake at 400 degrees for 18-20 minutes, or until golden brown. (I have a convection oven and it took closer to 16-17 minutes to get these wonderfully golden rolls).

Serve immediately and ENJOY!

Saturday, September 11, 2010

Conchas (Mexican Sweet Bread)

When my husband and I were dating, I remember his Mom would always buy Mexican Sweet Bread (Conchas) and Sweet Potato/ Pumpkin Empanadas. Yumm! I am still searching for an empanada recipe that I want to try, but I did find a good one for Conchas to share with you. My cinnamon loving son loved these- as did my husband's co-workers (oh and the rest of the family)! Imagine that....a recipe I didn't change :-)

(Yes, there are some "hidden Mickey's" in the batch :-) )

Ingredients
2 1/2 tsp yeast
1/2 cup warm water (110 degrees)
1/2 cup evaporate milk
3/8 cup white sugar
1 tsp salt
1/3 cup unsalted butter, melted
1 egg
4 cups all purpose flour
1/2 tsp ground cinnamon
2/3 cup white sugar
1/2 cup unsalted butter
1 cup all purpose flour
2 tsp ground cinnamon
1 tsp vanilla

Directions
1. In a large bowl, stir together the yeast and warm water. Let sit about 5 minutes. Mix in the milk, 3/8 cup sugar, 1/3 cup melted butter, salt, egg and half of the flour. Gradually mix in the remaining flour, and 1/2 tsp cinnamon. Turn the dough out onto a floured counter to knead as soon as it pulls together enough.

2. Knead for 6 to 8 minutes, until smooth and elastic. Place in a large greased bowl and turn the dough to coat. Cover, and let rise in a warm place until doubled, about 1 hour.

3. Make the topping while the dough rises. In a medium bowl, beat 2/3 cup sugar and 1/2 cup butter until light and fluffy. Stir in the flour until the mixture is the consistency of thick paste. Divide into two parts, and place one part in a separate bowl. Mix cinnamon into one half and vanilla into the other.

4. When the dough is done rising, cut into 12 even pieces (or more pieces for smaller Conchas). Shape into balls, and place on a greased cookie sheet, spacing about 3 inches apart. Divide each bowl of topping into 6 balls (or however many you are making), and pat flat. Place circles of topping on top of the dough balls and pat down lightly. Use a knife to cut grooves or designs in the topping. Cover and let rise until doubled, about 45 minutes.

5. Preheat the oven to 375 degrees. Bake for 20 minutes, or until lightly golden brown.


Enjoy!!

Wednesday, April 7, 2010

More Focaccia Bread

Although we have come to love this Focaccia bread recipe, I was intrigued by this recipe from The Bread Baker's Apprentice book by Peter Reinhart that is supposed to be more "authentic". Unlike the previous one that you can decide to make just hours before, this recipe takes 2 days to make. So, you definitely have to prepare in advance for this one. It actually took a few weeks for me to get around to making this one because I kept forgetting to get it started the night before.

While there were a lot of steps to making this bread, none of the steps were difficult by any means. The hardest part of this recipe was the waiting...and more waiting. I used my electric mixer, but the recipe can be adapted for doing this by hand. One thing I didn't do correctly was adding the cheese at the beginning of the baking process- you want to wait until after it has baked the first 5 to 10 minutes or it will get too brown and burn.

Overall, this bread had a great texture and taste and I will definitely make this one again!

Ingredients
5 cups bread flour
2 tsp salt
2 tsp yeast
6 tbsp olive oil
2 cups water, at room temperature
1/4 to 1/2 cup Herb Oil (recipe below)

Directions
1. Stir together flour, salt and yeast in the bowl of an electric mixer. Add the oil and water and mix on low speed with the paddle attachment. Switch to the dough hook and mix on medium speed for 5 to 7 minutes, or as long as it takes to create a smooth, sticky dough. The dough should clear the sides of the bowl, but stick to the bottom of the bowl. You may need to add additional flour to firm up the dough, but it should still be quite soft and sticky.
2. Sprinkle enough flour on the counter to make a space about 6 inches square. Using a scraper or spatula dipped in water, transfer the sticky dough to the counter and dust with flour. Shape the dough into a rectangle. Wait 5 minutes for the dough to relax.


3. Coat your hands with flour and stretch the dough from each end to twice its size. Fold it letter style over itself to return it to a rectangular shape. Mist the top of the dough with oil, dust with flour and loosely cover with plastic wrap.

4. Let dough rest for 30 minutes. Stretch and fold the dough again; mist with oil, dust with flour and cover. After 30 minutes, repeat this again.
5. Allow the covered dough to rest on the counter for 1 hour. It should swell, but not necessarily double in size.
6. Line a 17 x 12 inch sheet pan with parchment and follow the shaping and panning instructions below.
7. Loosely cover the pan with plastic wrap. Refrigerate the dough overnight (or up to 3 days).

8. Remove the pan from the refrigerator 3 hours before baking. Drizzle additional herb oil over the surface and dimple the dough with your fingers. The dough should fill the pan and be about 1/2 inch tall Add any other pre-proof toppings desired. Again, cover the pan with plastic and proof the dough at room temperature for 3 hours, or until the dough doubles in size, rising to a thickness of nearly 1 inch.
9. Preheat the oven to 500 degrees with the oven rack in the middle of the oven. Gently place any pre-bake toppings on the dough.
10. Place the pan in the oven. Lower the oven setting to 450 degrees and bake for 10 minutes. Rotate the pan 180 degrees and continue baking the focaccia for 5 to 10 minutes, or until it begins to turn a light golden brown. If you are using baking toppings, sprinkle them on at this point and continue baking an additional 5 minutes. The internal temperature of the dough should be above 200 degrees. The cheese should melt, but not burn.
11. Remove the pan from the oven and immediately transfer the focaccia out of the pan to a cooling rack.
12. Allow the focaccia to cool for at least 20 minutes before slicing and serving.

Shaping Focaccia

A. Drizzle 1/4 cup of olive oil over the paper and spread with your hands to cover the surface. Lightly oil your hands and using a scraper, lift the dough off of the counter and transfer to the pan, maintaining it's shape.
B. Spoon half of the herb oil over the dough.
C. Use your fingertips to dimple the dough and spread it to fill the pan. Only use your fingertips so you do not rip the dough. Try to keep the thickness of the dough as uniform as possible. If the dough becomes too springy, let it rest for about 15 minutes and continue dimpling. Don't worry if you aren't able to completely fill the pan 100%- as the dough relaxes and proofs it will spread naturally. Use more herb oil as needed to ensure that the entire surface is coated with oil.

Herb Oil
-The generous application of herb oil to focaccia will enhance the flavor of the dough more than any toppings. There are many ways to make this oil, and you can make it in any quantity. You can either use dry or fresh herbs, or a combination. Do not heat the oil, just warm it, and then let the herbs steep in the warm oil, infusing it with their wonderful flavors.
-Here is one way to make it, but feel free to substitute your favorite herbs and spices. The olive oil you use does not have to be extra virgin because it will be cooked later, and the subtle flavor of extra virgin will be lost.

Warm 2 cups of oil to about 100 degrees. Add 1 cup chopped fresh herbs. The herbs may include basil, parsley, oregano, tarragon, rosemary, thyme, cilantro, savory and sage, in any combination. (Substitute 1/3 cup dried herbs or a combination of dry and fresh). Add 1 tbsp kosher salt, 1 tsp black pepper and 1 tbsp granulated garlic or 5 to 6 cloves fresh garlic chopped or pressed. You may also add 1 tsp paprika, 1 tsp ground cayenne pepper, 1 tbsp fennel seeds, 1 tsp onion powder, or 1 tbsp dried minced onions. Store any leftover herb oil in the refrigerator for up to 2 weeks.


Enjoy!

Tuesday, March 2, 2010

Honey Yeast Rolls

As I was looking through my bookmarked recipes for a bread to make to go with our chicken and potato dinner, I remembered drooling over these Honey Yeast Rolls from Amber's Delectable Delights. It was just the recipe that I was looking for so I got to work!

This was a really easy dough to work with and the rolls were VERY tasty! They were light and fluffy with a hint of honey. The kids loved these as well. This recipe will definitely be a keeper!

Ingredients
2 1/4 tsp instant yeast
1 cup warm water (110 degrees)
1/4 cup honey
3 tbsp canola oil
1 1/2 tsp salt
1 egg, lightly beaten
4 cups bread flour
cooking spray
1 tbsp butter, melted
1 tbsp honey
Directions
In a mixer bowl with the paddle attachment, combine yeast with warm water and let set for 10 minutes until foamy. Add the honey,oil, salt and egg and mix well.

Add 3 cups of the flour and mix until the dough comes together in a sticky mass. With the mixer on low speed, add enough of the remaining flour to get a good dough- I used about 1/2 cup here. Change to the dough hook and knead on low speed until the dough is smooth and elastic, about 8 minutes.

Form the dough into a ball and transfer to a lightly oiled bowl, turning to coat.


Cover the bowl with a damp towel and let the dough rise in a warm spot until doubled in bulk (about 2 hours).

Turn the dough out onto a lightly floured surface and knead for 30 seconds. Cover and let rest for 10 minutes.


Punch the dough down and divide into 12 equal portions. Shape each into a all and place in lightly oiled dish (I used a 9 x 13 dish). Cover and let rise in a warm spot for at least 20 minutes.


Mix together melted butter and honey and brush lightly over the tops of the dough. Bake at 400 degrees for 13-15 minutes or until lightly browned. Serve warm or at room temperature.


Enjoy!

Tuesday, February 23, 2010

French Bread

I wanted to make bread to go along with our Potato Broccoli Cheese Soup and found this French Bread recipe on Allrecipes.com that sounded like a good choice.

There are times that I enjoy making the bread completely by hand and other times- like after a busy weekend- when I prefer to let my Bread Machine earn it's keep. I love being able to throw everything in the machine and let it go while I do other things. So, using the bread machine made this an easy recipe. This made a really nice french bread that was crusty on the outside but very soft on the inside. This recipe is definitely a keeper!

Ingredients
1 1/4 cups water (70-80 degrees)
2 tsp sugar
1 tsp salt
3 1/2 cups bread flour
1 1/2 tsp active dry yeast
1 tbsp cornmeal
Glaze:
1 egg
1 tbsp water
2 tsp sesame seeds, toasted (optional- I left these off)

Directions
1. Put the first 5 ingredients in your bread machine in the order recommended by the manufacturer (mine says liquids then dry). Select dough cycle and start. After 5 minutes, check the dough and add 1 to 2 tbsp warm water or flour if needed.


2. When cycle is complete, turn dough onto a lightly floured surface. Divide in half. Roll each portion into a 10 inch x 8 inch rectangle. Roll up jelly roll style, starting with the long end; pinch seams to seal.

3. Sprinkle a greased sheet with cornmeal; place loaves seam side down on pan. Make 4-5 slashes in the dough with a sharp knife. Cover and let rise in warm place until double, about 20 minutes. (*note- the original recipe says to cut slashes in the dough AFTER the 20 minute rise- I cut one loaf before the rise and one after and much preferred the one I did at this stage).


4. Whisk egg and water; brush over loaves. Sprinkle with sesame seeds if desired. Bake at 375 degrees for 20-25 minutes or until golden brown. Cool on wire racks.


Enjoy!

Monday, February 22, 2010

Cinnamon Rolls

One of our favorite "breakfasts" at Disney World is the HUGE cinnamon roll from the Main Street Bakery at the Magic Kingdom (drooling here). That is a must for us on every trip- can't wait to have one in May!!

There are a few good cinnamon roll recipes floating out there and I decided to start with this one titled "Clone of a Cinnabon" from Allrecipes.com. This makes a really great cinnamon roll that we all enjoyed. This is definitely NOT a last minute or spur of the moment recipe though. I used my bread machine for the mixing/ rising part and from starting the dough to enjoying the delicious rolls is 3 hours! Having cinnamon rolls for Christmas morning is a tradition in our house, so that means getting started early! Or just bake them the night before and reheat ;-)

A few notes on this recipe...I read a lot of the reviews and many people suggested that you double the icing, so I did. But as much as I love icing, in the end I only used the amount listed below. Double the icing would have been way too much for me- but that's purely a personal taste! A few reviewers had problems with the cinnamon mixture oozing out of the bottom, but mind held together fine. When I make these again, I will turn the temperature down to about 375 and cook a little longer. I felt that the tops were getting too brown while the parts of the rolls that were touching were still gooey (uncooked gooey- not yummy gooey). So, just a few modifications to make this an awesome breakfast or dessert!

Ingredients
1 cup warm water (110 degrees)
2 eggs at room temperature
1/3 cup margarine, melted
4 1/2 cups bread flour
1 tsp salt
1/2 cup white sugar
2 1/2 tsp bread machine yeast

1 cup packed brown sugar
2 1/2 tsp ground cinnamon
1/3 cup butter, softened

1 (3 oz) package cream cheese, softened
1/4 cup butter, softened
1 1/2 cups confectioner's sugar
1/2 tsp vanilla extract
1/8 tsp salt

Directions
1. Place ingredients in the bread machine in the order recommended by the manufacturer (Mine recommends wet ingredients followed by dry ingredients). Select dough cycle and start.

2. After the dough has doubled in size, turn it onto a lightly floured surface; cover and let rest 10 minutes. In a small bowl,combine brown sugar and cinnamon.


3. Roll dough into a 16 x 21 inch rectangle. Spread dough with 1/3 cup butter and sprinkle evenly with sugar/ cinnamon mixture. Roll up dough and cut into 12 rolls.

Place rolls in a lightly greased 9 x 13 inch baking pan. (Many people recommend cutting these using a piece of dental floss, but I find that to be too messy. A serrated knife works perfectly for me).


Cover and let rise until nearly doubled, about 30 minutes. (If I don't have a "warm" area to put these in, I preheat the oven to 200 and turn it off, then put the rolls in the oven to rise- works like a charm). Meanwhile, preheat oven to 400 degrees.


4. Bake rolls in preheated oven until golden brown, about 15 minutes.
While rolls are baking, beat together cream cheese, 1/4 cup butter, confectioner's sugar, vanilla and salt. Spread frosting on warm rolls before serving.
These are of course served best nice and warm. The wonderful wife that I am had these ready for my dear husband right after his 6 mile run Sunday morning! Talk about ruining a workout, huh?
But I'll take this to mean that they were good....

Enjoy!