Thursday, February 10, 2011

Chicken Stew and Dumplings

This continued cold weather had me in the mood for something hearty and yummy. So, off to my recipe stash to find something to make! I came across and Chicken Stew with Dumplings from the Williams Sonoma One Pot Cookbook. This recipe is listed under the 30 minute meals and it is very simple to make!


This recipe was good...no make that GREAT! The texture and taste of the dumplings was perfect and the stew part was wonderful. Everyone had at least seconds of this one! We had a small amount leftover that my daughter and I shared for lunch the next day. VERY good and very easy!

If you would prefer a crock pot recipe, try this yummy Chicken and Dumplings recipe.


Ingredients

Stew
1 1/2 lb skinless, boneless chicken thighs, cut into bite sized pieces (I used 2 boneless chicken breasts)
2 tbsp unsalted butter
3 carrots, thinly sliced (or about 10 baby carrots)
1 yellow onion, diced
2 stalks celery, thinly sliced
2 tbsp flour
4 cups chicken broth (I used low sodium)

Dumplings:
2 cups all purpose flour
2 tsp baking powder
1 tsp salt
1/2 cup cold unsalted butter, cut into small pieces
1/2 cup milk
1 cup shredded cheddar cheese

Directions

Melt 2 tbsp of butter in a Dutch oven over medium high heat. Season the chicken with salt and pepper and add to the hot pot. Cook, stirring often, until golden brown, about 4 minutes.
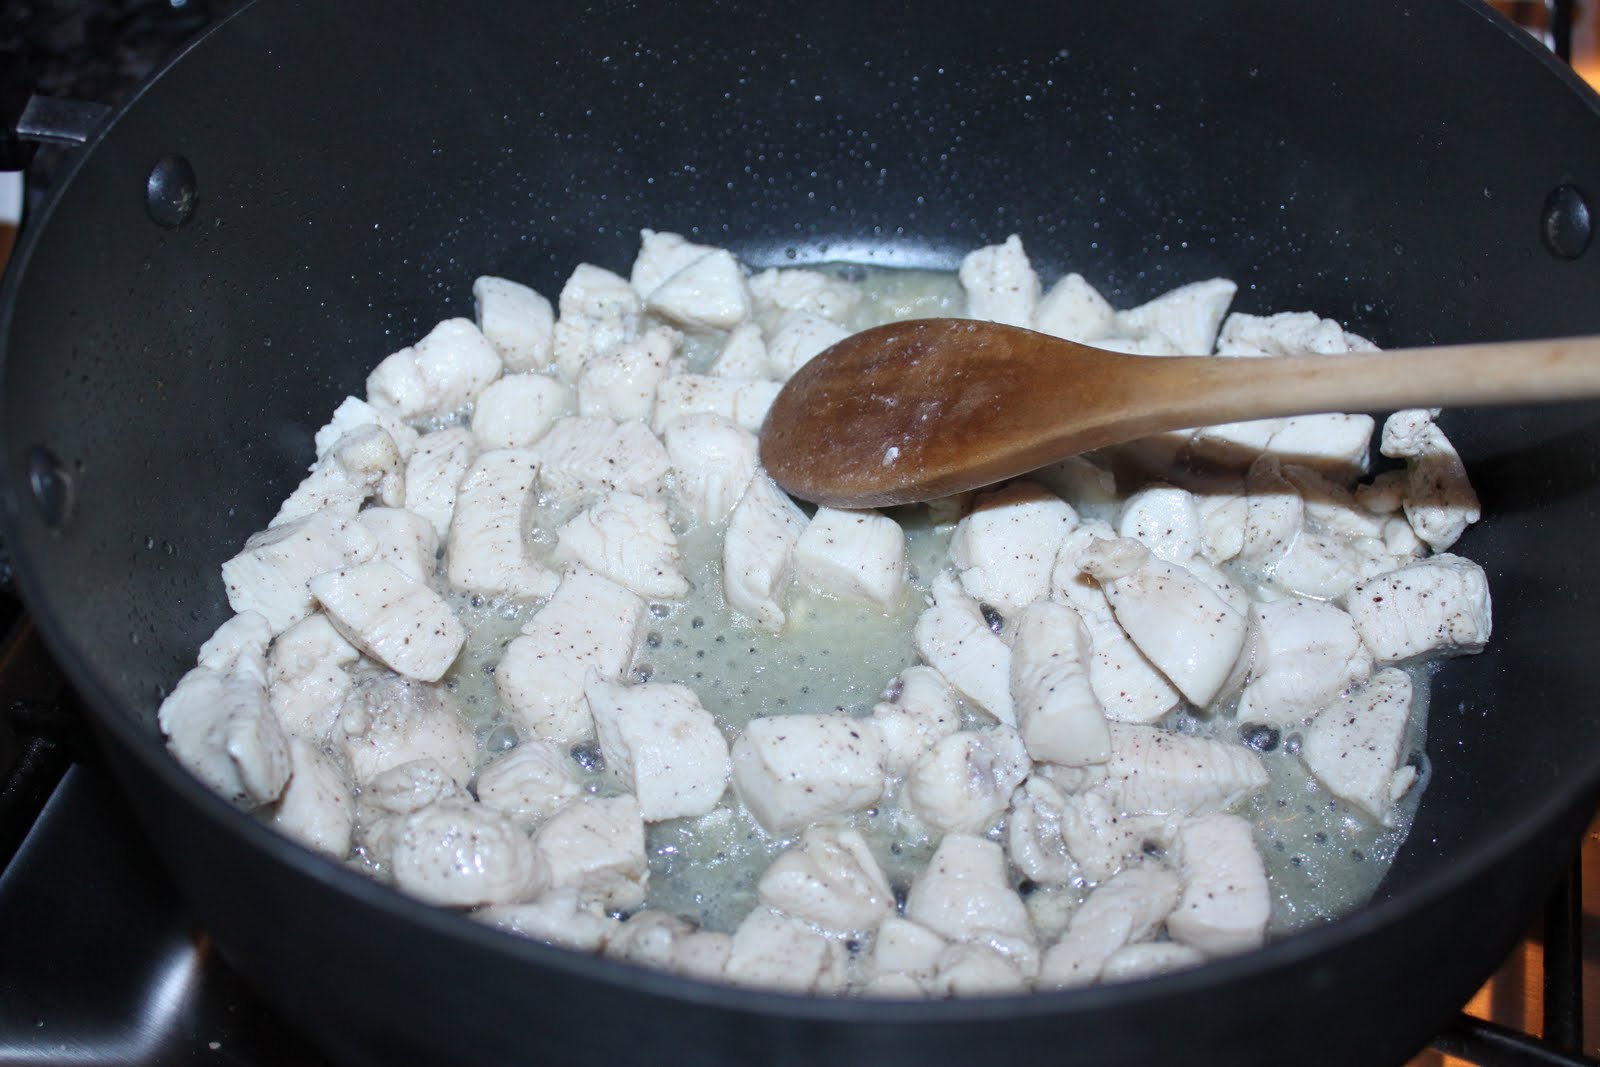

Add the vegetables and season with salt and pepper. Cook until the vegetables begin to soften and the chicken is cooked through, about 4-5 minutes.

Add the flour and cook, stirring for about 2 minutes.

Slowly add the chicken broth and bring to a boil.

Meanwhile, make the dumplings. Combine the flour, baking powder and salt in a medium bowl. Using a pastry blender (I use my hands), work the butter into the flour until the mixture forms coarse crumbs the size of peas.

Add the milk and cheese and stir until combined. This should form a soft, slightly sticky dough.


Drop heaping teaspoons of the dough into the boiling stew.


Reduce the heat to low and cover the pot.


Cook over low heat until the dumplings have nearly doubled in size, about 8-10 minutes. Serve immediately.


ENJOY!

Wednesday, February 9, 2011

Bite Sized French Toast

One of my favorite breakfasts when I was little was by far French Toast! What's not to love about it?? So, when I realized we had some "less than fresh" bread on our hands, I thought this was the perfect solution to use it up!

I used regular sandwich bread, but you could use the thicker Texas Toast or even a bakery type bread- whatever suits your tastes. It does work best to use a sturdy or "stale" loaf of bread. I wanted to make these into "bite size" pieces for the kids. There is something about bite sized food that is super fun for kids! Score one for Mom!

Ingredients (6 servings)

1 loaf bread
6 eggs
1 cup milk (I used 2%)
2 tsp vanilla
1 tsp cinnamon
butter
powdered sugar
syrup

Directions

Remove crust from bread and cut into fourths.

In a bowl, whisk together eggs, milk, vanilla and cinnamon.

Heat skillet to medium heat and melt a tbsp of butter. Dip the bread cubes in the mixture to fully coat. Shake off excess and add to hot pan.

Turn bread to brown both sides, about 5 minutes total.

Keep these warm while you continue to cook the remainder.


Sprinkle with powdered sugar and serve immediately.


ENJOY!

Tuesday, February 8, 2011

Baked Potato Soup

While we continue to be "iced in" the house, I was looking for a good hearty recipe for dinner. I really wanted Chicken and Dumplings, but didn't have all of the ingredients. So, I opted to make a baked potato soup. Rather than searching for recipes, I just sort of winged it to see what I came up with.

The recipe I made, was a lot of soup- especially since only my husband and I ate it for the most part. So, I would probably half the recipe next time which would be plenty. Since we had so much leftover, I heated some up for lunch the next day. If you want to eat the leftovers, be aware that you will probably want to heat it on the stove and add some liquid (milk or broth) to thin it out to a good consistency. While it was still good the next day, I wouldn't say it was as good as freshly made- which is another reason I would just make half next time! But all in all, I would say that this was a good soup and came together very quickly. This would be especially good to make if you had some leftover baked potatoes lying around.

I really wanted to make these French Bread Rolls to go with it, but *thought* I was out of bread flour. That will teach me not to look a little better next time as these rolls would have been fabulous with the soup!


Ingredients

4 baking potatoes, baked, peeled and cubed
2/3 cup butter
2/3 cup flour
7 cups milk
4 green onions, chopped
6 strips bacon cooked and crumbled (I used turkey bacon)
1 1/2 cups sharp cheddar cheese, shredded
1 cup sour cream
salt and pepper to taste

Directions

Melt the butter in a large pan. Stir in the flour and whisk until smooth.

Slowly add the milk and continue stirring until thickened, about 10 minutes.


Add the cooked potatoes and onions and bring to a boil. Simmer and cook for 10 minutes.

Stir in the cheese, sour cream, bacon and salt and pepper. Continue stirring until the cheese is melted. Garnish with bacon, cheese and sour cream. Serve immediately.
ENJOY!

Monday, February 7, 2011

Barbeque Chicken Fajita Tacos

There are so many things you can make with chicken and so many ways to make fajita tacos as well! I wasn't sure what I wanted to make, but had some barbecue sauce and chicken so I came up with a chicken taco. I basted the chicken with the sauce and it gave it a hint of flavor without being overpowering. You really could use any sauce you like to baste the chicken with and come up with a tasty fajita taco (or quesadilla, or...). We served the fajita tacos with Mexican Rice and it was a very tasty meal. I found that a sweet sauce worked best for our tastes.


Ingredients (4 servings)

2 boneless, skinless chicken breasts
your favorite barbecue sauce
1 onion, cut in strips
1 green bell pepper, cut in strips
salt and pepper to taste
flour tortillas
shredded cheese
sour cream (optional)

Directions
Grill the chicken breasts until done, basting as they cook. Remove from pan to cool slightly before slicing (or shredding).

Add onions and peppers to skillet and saute over medium heat until tender. Add salt and pepper.


Heat up tortillas and assemble fajita tacos with meat, onion and peppers and cheese. Top with desired toppings (sour cream, guacamole, etc). You can also pour on a little more barbecue sauce to enhance the flavor.


ENJOY!

Sunday, February 6, 2011

America's Test Kitchen Chewy Brownies

I seem to be on a quest for the "perfect brownie" (among other recipes). This past weekend, my husband turned to America's Test Kitchen and they happened to be making the "Ultimate Chewy Brownie". We were definitely intrigued with the recipe and wondered how we would like this version.

There have been a few recipes that I have tried lately that have that one (or more) questionable ingredient that almost makes me ditch the whole thing. Anyone who knows me knows that I do not (and never have nor will) drink coffee of any kind. So, when I saw that the second ingredient in this recipe was Espresso, I was initially turned off. But, would we be missing out by not trying this recipe? After all, it's the Ultimate Chewy Brownie from their test kitchen! I decided to forge through and went to the store for Espresso and the rest of the ingredients. I will say that while making the batter (especially the very beginning), I was very turned off by the coffee aroma and was very skeptical about the finished product.

I'm a little quirky- I can be uber patient on some things, but not so much on others. And waiting for brownies (or other food) to cool, is not a strong point of mine. I mean, why do I need to wait???? This recipe says to let the brownies cool 2 1/2 hours!!! What?!? So, being the rebel that I am on occasion, my husband and I tried the first bite after about 20 minutes of cooling. Our initial reaction? We both came to the conclusion that maybe we don't know what a good brownie tastes like. I won't deny that I was disappointed after following the directions to a T. Not that this was bad by any means, but it didn't wow us at all. I left the remainder on the rack to finish cooling. When I went back into the kitchen to put them away, I couldn't help but take a little bite. And....it did WOW me then! It's like the whole texture of the brownie changed as it completely cooled. I don't think I have tasted enough recipes (hint, hint) to proclaim this the "Ultimate" brownie, but it sure was good! It is very rich, chocolaty and chewy!


Ingredients (24 brownies or 48 bite sized)


1/3 cup Dutch-processed cocoa (I sifted the cocoa)
1 1/2 tsp instant espresso (optional)
1/2 cup plus 2 tbsp boiling water
2 oz unsweetened chocolate, finely chopped
4 tbsp unsalted butter, melted
1/2 cup plus 2 tbsp vegetable oil
2 large eggs
2 large egg yolks
2 tsp vanilla
2 1/2 cups sugar
1 3/4 cups flour
3/4 tsp salt
6 oz bittersweet chocolate, cut into 1/2 inch pieces


Directions

Preheat oven to 350 degrees. Line a 9x13 inch baking pan with foil and spray with cooking spray.


Whisk cocoa, espresso powder, and boiling water in a large bowl until smooth. Add unsweetened chocolate and whisk until chocolate is melted.

Whisk in melted butter and oil. (Mixture may look curdled).

Add eggs, yolks, and vanilla and continue to whisk until smooth and homogeneous.


Whisk in sugar until fully incorporated.

Add flour and salt and mix with rubber spatula until combined. Fold in bittersweet chocolate pieces.

Scrape batter into prepared pan.

Bake at 350 degrees until toothpick inserted halfway between edge and center comes out with just a few moist crumbs. Bake about 30-35 minutes.


Transfer pan to wire rack and cook 1 1/2 hours. Using foil, lift brownies from pan. Place on wire rack and cool completely, about 1 hour. Cut into squares and serve. Store any leftovers in an airtight container at room temperature for up to 4 days.


ENJOY!!

Saturday, February 5, 2011

Cinnamon Applesauce

Sometimes I like to do some things the hard way! Well, I wouldn't exactly call making homemade applesauce "hard"- but it's definitely not as convenient as just buying it at the store! But since I love cooking and knowing exactly what is in the foods I am feeding my family, it just seemed natural to make applesauce. And the kids LOVED it! I doubt there will be anymore store bought applesauce here (so good thing it is easy :-) )!

I think the key to good applesauce is in the type of apple you use. You want to choose apples that are naturally more sweet so that you do not have to use a lot of additional sugar. Naturally sweet apples are Red Delicious, Gala, Fuji, and McIntosh. I like to use a combination of apples rather than just one type. I used Gala and Fuji this time around- but you can change it up however you like. You can start with a few tbsp. of sugar and add more as they cook if needed. This is a very easy and versatile recipe and a great way to use up some yummy apples!


Ingredients (makes 4 servings
4 apples, peeled, cored and chopped
3/4 cup water
1/4 cup sugar (or start with less and adjust after cooking)
1/2 tsp cinnamon (optional)

Directions
In a saucepan, combine apples, water, sugar and cinnamon.

Cover and cook over medium heat for 15-20 minutes until apples are soft.


Allow apples to cool and then mash with potato masher to desired consistency. Serve immediately and refrigerate leftovers.

ENJOY!

Friday, February 4, 2011

Oatmeal Bars

Sometimes the best recipes are still found on the ingredient boxes! My family loves the Quaker Oats Oatmeal Cookie recipe that I found on a canister a few years ago. This makes a very moist, yummy and nutritious (well at least somewhat) snack for anytime! I very seldom make the actual cookies though- probably 90% of the time I make these into the bar variation listed in the directions. I will post the recipe how we make them, but if you want to make cookies instead, just refer to the link above! Some of variations include adding 1 cup raisins or chopped nuts. Or omit the cinnamon and nutmeg and add 1 cup chocolate chips, butterscotch chips or peanut butter chips. Yum!

Ingredients (Makes 24 bars)

1 1/4 cups (2 1/2 sticks) unsalted butter, softened
3/4 cup packed light brown sugar
1/2 cup sugar
1 egg
1 tsp vanilla
1 1/2 cups flour
1 tsp baking soda
1 tsp ground cinnamon
1/2 tsp salt (omit if you use salted butter)
1/4 tsp ground nutmeg
3 cups Quaker Oats (quick or old fashioned, uncooked)

Directions
Heat oven to 375 degrees. In a large bowl, beat margarine and sugars until creamy. Add egg and vanilla; beat well. Add flour, baking soda, cinnamon, salt and nutmeg and mix well. Stir in oats until combined.

Press dough into the bottom of a greased 9x13 inch baking pan. Bake 25-30 minutes or until light golden brown. Cool completely in pan. Cut into bars. Store tightly covered.


ENJOY!

Thursday, February 3, 2011

Classic Tomato Sauce

It just seems wrong to use jarred pizza sauce on a homemade pizza crust! So, I went to the pantry to see what I could come up with. The outcome? A REALLY tasty tomato sauce that could be used on anything from pizza to pasta. My husband and I love spicy foods, but the kids do not. So, I only added red pepper flakes to one half of the recipe and left the other half plain for the kids. This is such a simple sauce that there is no need for the jarred kind (with all those preservatives)!


Ingredients

3 tbsp olive oil
3 cloves garlic, minced
1/2 tsp red pepper flakes (more or less to taste)
1/2 tsp salt
28 oz can crushed tomatoes

Directions


In a medium saucepan, heat the olive oil. Add the minced garlic, red pepper flakes and salt. Stir and saute for 45 seconds (do not brown the garlic). Stir in the tomatoes. Heat the sauce over a low simmer for 5 to 10 minutes. Remove from heat and use as desired.


I initially used the sauce for our pizza, but thought it would taste great tossed with some pasta and a little cheese...and I was right! :-)


ENJOY!

Wednesday, February 2, 2011

Pizza Pizza!

Another pizza recipe??? What can I say, my family loves pizza! My husband really likes pizza and the kids are coming around to liking it. Since we were "home bound" for the ice day, we decided to make homemade pizza for lunch. We used the bread machine to mix and rise the dough- can't get much easier than that! This dough was really easy to work with and made a very good pizza! We made one pizza for the kids and one for us (spicy sauce). I baked theirs on a greased baking sheet and baked ours on a pizza stone. Both came out very good ! The one for the kids came out with a soft crust that they both loved. And ours came out with a crust that was crispy on the outside and soft and chewy on the inside- perfect! I would say that this recipe was definitely a success since Daniel had 6 pieces!! (That is saying A LOT for my picky eater!) We will definitely be making this one again!

This recipe is a compilation of many recipes that we have tried. The fun thing about making pizza is that you can add whatever toppings you like and everyone can help! We went simple and opted for cheese pizzas this time, but there are so many options!

**This pizza has quickly become a very requested thing in our house which still amazes me- my kids LOVE it! I wanted to add a few tips from the various times I have made it so far. First, the recipe says to divide the dough into 2 and work with your hands to spread it out to desired shape. The first time I made this, I was quite sure one half was not going to spread out to a good size. So, I decided to leave it as one piece and spread it out. MISTAKE! The pizza puffed up about 2 inches high in the oven and it was a crazy mess. Initially, it will seem impossible to spread it out with your hands. But trust me- it is very easy to work with on a greased pan. I can easily get one half of the dough to a 12" pizza size or even a little larger. If it seems hard to work with, let it rest a few minutes and try again. Second: There are times that the kids want pizza and we don't so 2 pizzas is too much. While my son loves the pizza, he isn't too fond of "reheated pizza". So, the last time I tried to refrigerate half of the recipe to use another day, but it just didn't work out :-( But on another occasion, I was able to halve all of the ingredients and make just one pizza.

**If you do not have a bread machine, you can still make this! If you have a stand mixer, combine the ingredients and use the dough hook attachment to knead the dough. (If you don't have a stand mixer, you can mix the ingredients by hand and knead until smooth) Turn the dough onto a lightly floured surface and knead until smooth. Spray an oven safe bowl with cooking spray. Put the dough in the bowl and turn it around to get the cooking spray on all sides. Cover the bowl with a towel and place in a warm area until the dough doubles. My trick for letting the dough rise is to turn your oven on to 170 degrees- once it gets to 170, turn the oven off and put the covered bowl in the oven until doubled- usually about 30-40 minutes.


Ingredients

1 cup warm water (110 degrees)
1 tsp sugar
2 tbsp olive oil
1 tbsp honey
1 tsp salt
3 cups bread flour
2 1/4 tsp yeast (I use bread machine yeast)
pizza sauce (canned or homemade)
shredded cheese
toppings of choice


Directions
Put ingredients in bread machine pan in order given above. Turn on dough cycle.

When dough is complete, remove from pan and put on a floured surface. Divide the dough into 2 pieces. Spray a heavy pizza pan with olive oil or cooking spray. Use your hands to flatten and stretch the dough to fit the pan. If you have trouble stretching the dough, let it rest a few minutes before continuing.

Layer sauce then cheese and other toppings. You want to keep the ingredient load in check- if you put too much, it will cause the crust to be too soggy and take too long to bake. Bake in oven preheated to 450 degrees. Let cool 2-3 minutes before slicing. As much as you will want to cut right into the pizza, allowing it to rest a few minutes will keep the cheese from sliding off!


ENJOY!!

Tuesday, February 1, 2011

Chocolate Chip Pancakes

We are having one of those rare snow days in Texas today so everyone is snuggled at home! I was surprised that they cancelled school at 10pm last night before there was even any precipitation. But of course, it was a good call as there is a lot of ice (and some snow) out there this morning. So far, my husband's work is delayed 2 hours, but we're still hoping that they cancel. Even if they don't cancel, he'll work from home, so that's not too bad.

Anyway, back to the food! We eat pancakes quite often around here and I've had a chocolate chip pancake on my list to try so why not today? These turned out very fluffy with a hint of chocolate goodness. Not surprising, but these did not last long at all! Guess the kids are fueling up to go play in the bitter cold!! I'm sure you could simply add chocolate chips to your favorite recipe for a yummy result. The kids prefer their pancakes plain while Tony enjoyed his with syrup. I was somewhere in between and just used butter. :-)
.


Ingredients
2 cups flour
1/4 cup sugar
2 tbsp baking powder
1 tsp salt
2 eggs
1 1/2 cups milk (I used 2%)
1/4 cup vegetable oil
1/2 tsp vanilla extract
1/2 cup mini chocolate chips


Directions

In a bowl, combine flour, sugar, baking powder and salt. In another bowl, combine eggs, milk, oil and vanilla. Stir the wet ingredients into the dry ingredients and mix well. Add the chocolate chips. Using a 1/4 measuring cup, pour batter onto a hot griddle. Turn when bubbles form on top and cook until brown.


ENJOY!

Monday, January 31, 2011

One Bowl Brownies

Who doesn't love a yummy brownie?? There are so many great (and different) recipes out there for brownies! On my quest for the perfect (for my taste) brownies, I have been trying quite a few lately. I ran across this recipe for One Bowl Brownies that I decided to make. These were super easy to make (and clean up) and uses pretty basic ingredients. If you are looking for something yummy, gooey and full of chocolate, give these a try! These would be perfect for that last minute dessert you need to make!


Ingredients

3/4 cup butter
4 squares unsweetened chocolate
2 cups sugar
3 eggs
1 tsp vanilla
1 cup flour

Directions

Preheat oven to 350 degrees.
Melt the chocolate and butter for 2 minutes in the microwave. Stir the mixture until the chocolate is melted and smooth.
Stir in the sugar, eggs, vanilla, and flour.
Pour the brownie batter into a greased 9x13 inch pan. Bake the brownies for 20-25 minutes. Do not over bake. Start testing around 20 minutes with a toothpick.

ENJOY!

Sunday, January 30, 2011

Broccoli Rice Casserole

Strangely enough, broccoli is one of the few green vegetables that my husband and kids will eat. So a few years ago I started adding some sort of broccoli casserole to the Thanksgiving menu just for them. I haven't really found one that I'm head over heels for yet. A lot of the recipes out there call for Velveeta cheese which I am not too much a fan of. A good number of the recipes out there call for the same ingredients- I just changed/ added a few ingredients. This one turned out pretty tasty! I may still try to come up with something "even better", but for now this will be on the list!

Ingredients
2 (10 oz) packages frozen chopped broccoli
3 cups rice (long grain or instant)
1 (10.75 oz) can cream of mushroom soup
1 (10.75 oz) can cream of chicken soup
1 1/4 cups water
1 to 1 1/2 cups cheddar cheese, shredded
1 tbsp butter
1 bunch celery, chopped
1 large onion, chopped
3 cloves garlic, minced
salt and pepper to taste

Directions
1. Cook broccoli and rice according to packages. Preheat oven to 350 degrees.

2. In a saucepan over low heat, mix soups and water. Gradually add cheese and stir until melted.

3. Melt butter in a large skillet over medium-high heat and saute celery, onion and garlic until soft.

4. In a large mixing bowl, combine broccoli, rice, soup-cheese mixture and vegetables. Season with salt and pepper. Pour into a 9x13 inch baking dish.

5. Bake for 45 minutes until bubbly and golden brown.


ENJOY!

Saturday, January 29, 2011

Chicken Sandwiches

Have you ever seen a recipe or picture of food in a magazine and think that you just have to make it? I saw a "pulled chicken" sandwich in a magazine a few months ago and really wanted to make it. Since I couldn't remember where I saw it, I had to make a stab at making my own version. This type of recipe is very versatile so try your own version as well! The first time we had this, I used Monterrey Jack cheese and the second time Sharp Cheddar Cheese. Both were good, but I preferred the Cheddar. I think it would be good with Swiss Cheese too...well (as my Dad always says) that is if you like Swiss Cheese! :-) The sour cream/ tomatillo mixture does give it a little tang or kick. If you don't like that, you can simply stir fry some onions, peppers, garlic and chicken and top with cheese- yummy!

Ingredients
1 tbsp olive oil
1 small red onion, cut in strips
2 cloves garlic, chopped
juice of 1 lime
1 tbsp honey
1 1/2 cups tomatilla salsa (green salsa)
1/4 cup sour cream
meat from 1 rotisserie style chicken, shredded
4 sandwich rolls, split
1 cup cheese, shredded

Directions

Preheat broiler.

In a large skillet, heat the olive oil over medium-high heat. Add the onion and garlic and cook until softened, about 2 minutes. Stir in the lime juice and honey, then stir in salsa and heat through. Mix in the sour cream. Stir in the chicken to coat.

Pile the chicken mixture on the roll bottoms. Top with the cheese and broil to melt. Serve immediately.


ENJOY!